Static Blog Setup with Hexo, Amazon S3 and Grunt - Automating deployment with Grunt
This is Part-3 and the last post in the series on “Static Blog Setup with Hexo, Amazon S3 and Grunt“. You can view all the posts in this series here, Static Blog Setup with Hexo, Amazon S3 and Grunt.
In the last post, we setup hosting for the blog and configured DNS entries for our custom domain. In this final post of this series, we will automate the deployment to S3 using Grunt.js.
What is Grunt?
Grunt is a JavaScript task runner, which let’s you automate repetitive tasks such as minification, compiling, deployment, etc. making your job easier. Also, the Grunt ecosystem is huge with hundreds of plugins to choose from which will automate just about anything with minimum effort. You can read more about Grunt in detail here, Getting started with Grunt.js.
For the Hexo blog, we will use a specific set of plugins to perform common hexo tasks of cleaning, generating the public folder and starting the local server to automating the deployment of the generated files to the staging and production buckets on S3.
Let’s Grunt!
Installing Grunt is very easy if you have already installed Node.js:
npm install -g grunt-cli
This will install grunt globally on your machine. To install it on your local project directory, use:
npm install grunt --save-dev
Each Grunt project has a Gruntfile.js project file and the packages.json file as you will see in the root folder of your project after you install Grunt. The Gruntfile.js is used to configure or define the tasks and load the plugins. The packages file sits in the root right next to the Gruntfile and is used to list grunt and the grunt plugins used by the project as “devDependencies”.
Below are some of the tasks we want to accomplish for the blog to get started:
- Automate Hexo commands: ‘hexo clean’, ‘hexo generate’, ‘hexo server’
- Create sitemap.xml and robots.txt files for SEO
- Deploy to Amazon S3
You can view my blog’s entire Gruntfile here.
Let’s get started with automating the Hexo commands so we can have our local environment up and running with one command.
Download the grunt shell plugin in your project folder. I suggest reading the instructions on how it works to get a better understanding of the plugin.
npm install grunt-shell --save-dev
Once installed, you will see that the dependency has been automatically updated in the packages.json file. Now, let’s configure Gruntfile.js to load this plugin for use as shown below.
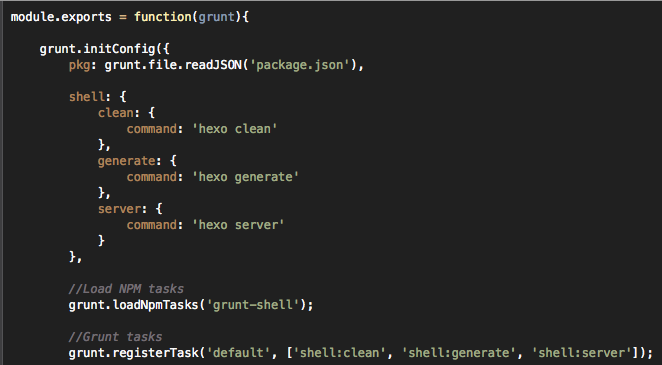
As you can see, I am combining all the hexo commands into one shell command. Go to bash and type grunt:
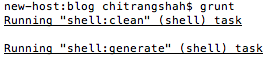
It will run all the commands listed for shell in the Gruntfile, cleaning the public folder, generating the files in public folder and finally, starting the Hexo local server. Go to http://localhost:4000 to see your blog.
Awesome! We just automated our local environment to generate the files and start the server in one command. Let’s add some more plugins to lessen the burden of basic functionality such as updating sitemap every time you add new posts and creation of robots.txt.
Download this Grunt Sitemap plugin and the Grunt robots.txt plugin:
npm install grunt-sitemap --save-dev
npm install grunt-robots-txt --save-dev
You can configure them in the Gruntfile as shown below:
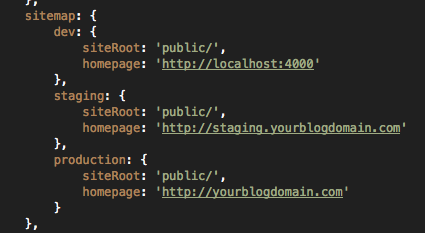
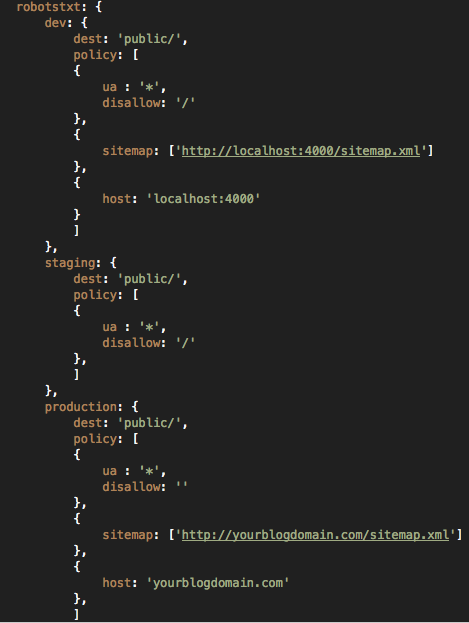
Now, every time you generate the static files for Hexo, a sitemap.xml file and a robots.txt file will be automatically generated in the public folder based on the configuration in Gruntfile.js. I have combined all these plugins and loaded them in one task:

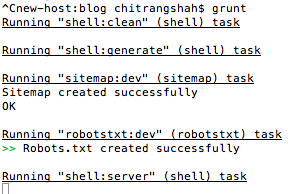
Typing grunt in bash will execute those commands, generating the files including sitemap and robots.txt and starting the local server:
Last, but not the least, let’s setup grunt to deploy all of these changes to their specific environments/buckets on Amazon S3. To do that, download this awesome Grunt S3 plugin.
npm install grunt-s3 --save-dev
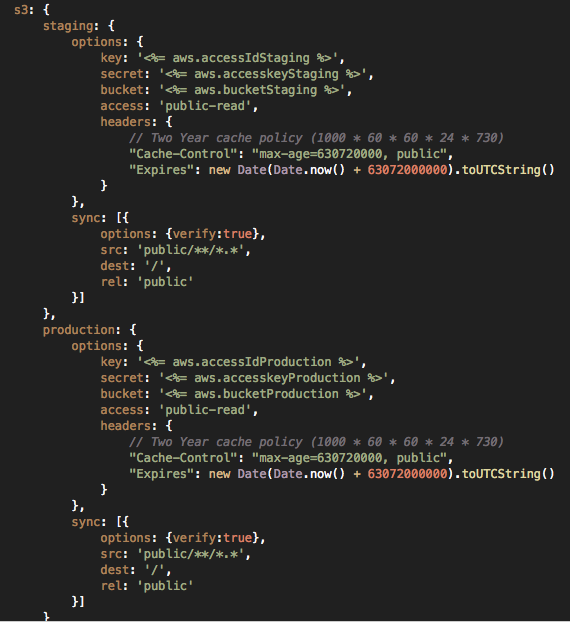
Once installed, you can configure it as shown below. Make sure that you have your AWS credentials. Also, add them in a separate JSON file and load them from that file to the Gruntfile for security reasons. You do not want your AWS credentials uploaded to your site or github by mistake!
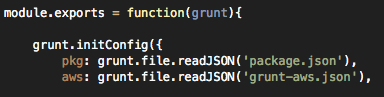
As you can see, I am loading my credentials from an external file. I am calling the external file right at the start:
Combining all of the above tasks into single commands for each environment in the Gruntfile:

That’s it! If you type in “grunt staging or grunt production”, it will generate all the files in the public folder, connect to S3 with the credentials provided and push all the files there.
This is the end of the series on Static Blog Setup with Hexo, Amazon S3 and Grunt. If you face any issues, do not hesitate to leave a comment or Contact Me.